Quick Start
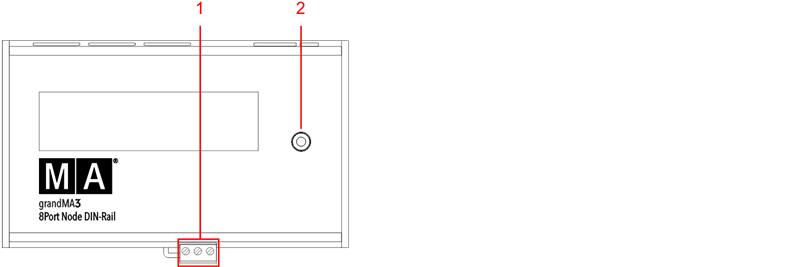
grandMA3 8Port Node DIN-Rail front panel
- Terminal block
- Rotary knob
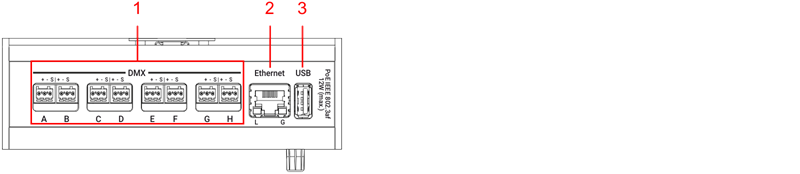
grandMA3 8Port Node DIN-Rail rear panel
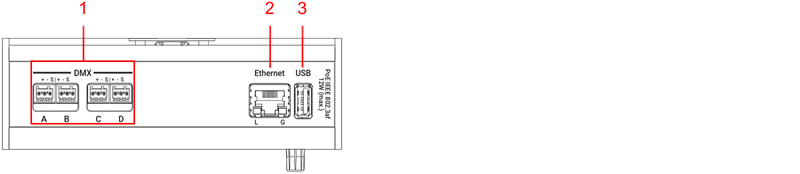
grandMA3 4Port Node DIN-Rail rear panel
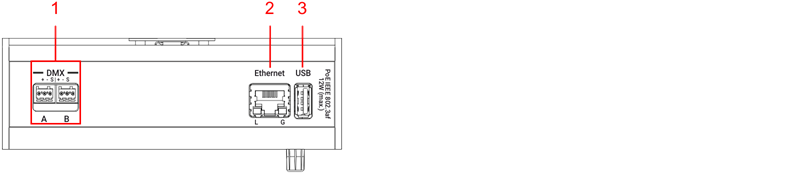
grandMA3 2Port Node DIN-Rail rear panel
Start-up
Section titled “Start-up”- Unpack the device.
- Remove the packaging and cushioning material.
- Install the device on a rail. For more information see Installation.
- Connect the grandMA3 xPort Node DIN-Rail with your PC, laptop, or a grandMA3 console using the RJ45 connector.
- Connect the grandMA3 xPort Node DIN-Rail with the electrical grid using a terminal block connector, a PoE switch, or a PoE injector.
- The device starts booting.
- To make basic settings, turn the rotary knob on the front panel of the device.
- To turn off the grandMA3 xPort Node DIN-Rail, disconnect the RJ45 connector or the terminal block connector.
Update the software
Section titled “Update the software”- To update a grandMA3 device, download the latest software version from www.malighting.com.
- The required installer is called grandMA3 Software x.x.x.x.
- Extract the zip file “grandMA3_stick_v.x.x.x.x.zip” and copy the folders EFI, ma, and the update.scr file into the root directory of your USB flash drive.
- Insert the USB flash drive in the device’s USB port.
- Turn off the grandMA3 device.
- Turn on the grandMA3 device.
The grandMA3 device starts to boot. - Follow the onscreen instructions during the update process.